Difference between revisions of "ROBOTS"
(→Coordinate systems) |
|||
| (16 intermediate revisions by 2 users not shown) | |||
| Line 1: | Line 1: | ||
| + | [[Category:Software]] | ||
== Robot Programming with Robots plugin == | == Robot Programming with Robots plugin == | ||
[part of the information explained here is coming from: https://github.com/visose/Robots/wiki/How-To-Use#grasshopper] | [part of the information explained here is coming from: https://github.com/visose/Robots/wiki/How-To-Use#grasshopper] | ||
| Line 60: | Line 61: | ||
'''TARGET''' | '''TARGET''' | ||
| − | [[File: | + | [[File:ROBOTSplugin target.JPG]] |
A target defines a robot pose, how to reach it and what to do when it gets there. A tool path is made out of a list of targets. Besides the pose, targets have the following attributes: tool, speed, zone, frame, external axes and commands. | A target defines a robot pose, how to reach it and what to do when it gets there. A tool path is made out of a list of targets. Besides the pose, targets have the following attributes: tool, speed, zone, frame, external axes and commands. | ||
| Line 84: | Line 85: | ||
Joint: This is the default motion type. In a joint motion, the controller calculates the joint rotation values on the target using inverse kinematics and moves all of the joints at proportional but fixed speeds so that they will stop at the same time at the desired target. The motion is linear in joint space but the TCP will follow a curved path in world space. It's useful if the path that the TCP follows is not critical, like in pick and place operations. Since inverse kinematics only needs to be calculated at the end of the path, it's also useful to avoid singularities. | Joint: This is the default motion type. In a joint motion, the controller calculates the joint rotation values on the target using inverse kinematics and moves all of the joints at proportional but fixed speeds so that they will stop at the same time at the desired target. The motion is linear in joint space but the TCP will follow a curved path in world space. It's useful if the path that the TCP follows is not critical, like in pick and place operations. Since inverse kinematics only needs to be calculated at the end of the path, it's also useful to avoid singularities. | ||
| − | [[File: | + | [[File:ROBOTSplugin target joint.JPG]] |
Linear: The robot moves towards the target in a straight line in world space. This is useful if the path that the TCP follows is critical, like while milling or extruding material. If the path goes through a singularity at any point it will not be able to continue. If it moves close to a singularity it might slow down below the programmed speed. | Linear: The robot moves towards the target in a straight line in world space. This is useful if the path that the TCP follows is critical, like while milling or extruding material. If the path goes through a singularity at any point it will not be able to continue. If it moves close to a singularity it might slow down below the programmed speed. | ||
| − | [[File: | + | [[File:ROBOTSplugin target linear.JPG]] |
'''Castings''' | '''Castings''' | ||
| Line 97: | Line 98: | ||
'''Tool''' | '''Tool''' | ||
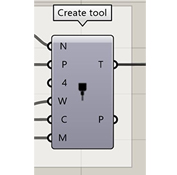
| − | [[File: | + | [[File:ROBOTSplugin create a tool.JPG]] |
This parameter defines a tool or end effector mounted to the flange of the robot. In most cases a single tool will be used throughout the tool path, but each target can have a different tool assigned. You might want to change tool if your end effector has more than one TCP, or due to load changes during pick and place. Contains the following attributes: | This parameter defines a tool or end effector mounted to the flange of the robot. In most cases a single tool will be used throughout the tool path, but each target can have a different tool assigned. You might want to change tool if your end effector has more than one TCP, or due to load changes during pick and place. Contains the following attributes: | ||
| Line 131: | Line 132: | ||
====Robot==== | ====Robot==== | ||
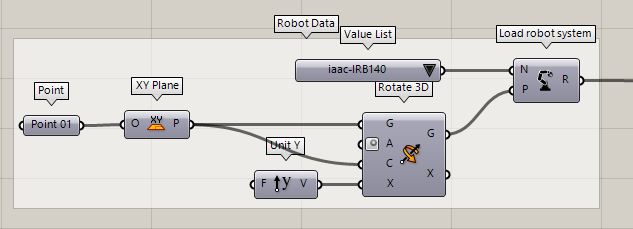
| − | [[File: | + | [[File:ROBOTSplugin_load_robot_system.JPG.JPG]] |
Represents a specific robot model. It's used to calculate the forward and inverse kinematics for Cartesian targets, to check for possible errors and warnings on a program, for collision detection and simulation. If your robot model is not included in the assembly, check the wiki on how to add your own custom models. | Represents a specific robot model. It's used to calculate the forward and inverse kinematics for Cartesian targets, to check for possible errors and warnings on a program, for collision detection and simulation. If your robot model is not included in the assembly, check the wiki on how to add your own custom models. | ||
Remote connection: You can use the robot parameter to connect to the robot controller through a network. Currently, this is only supported on UR robots. | Remote connection: You can use the robot parameter to connect to the robot controller through a network. Currently, this is only supported on UR robots. | ||
| − | |||
| − | |||
Create a program: | Create a program: | ||
| − | |||
Units: The plugin always uses the same units irrespective of the robot type or document settings. | Units: The plugin always uses the same units irrespective of the robot type or document settings. | ||
| Line 155: | Line 153: | ||
Angular speed: Radians per second | Angular speed: Radians per second | ||
| + | |||
'''Uploading the program to a robot''' | '''Uploading the program to a robot''' | ||
A program defines a complete toolpath and creates the necessary robot code to run it. To create a program you need a list of targets and a robot model. | A program defines a complete toolpath and creates the necessary robot code to run it. To create a program you need a list of targets and a robot model. | ||
| + | |||
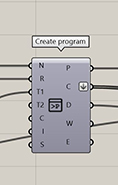
| + | [[File:ROBOTSplugin create a program.JPG]] | ||
When a program is created, the following post-processing is done: | When a program is created, the following post-processing is done: | ||
| Line 189: | Line 190: | ||
The program contains a simulation of the tool path. The simulation currently doesn't take into account acceleration, deceleration or approximation zones. It simulates both linear and joint motions, actual robot speed, including slowdowns when moving close to singularities and wait times. | The program contains a simulation of the tool path. The simulation currently doesn't take into account acceleration, deceleration or approximation zones. It simulates both linear and joint motions, actual robot speed, including slowdowns when moving close to singularities and wait times. | ||
| + | |||
| + | [[File:ROBOTSplugin program simulation.jpg]] | ||
'''Zone''' | '''Zone''' | ||
| Line 194: | Line 197: | ||
Defines an approximation zone for a target. Two variables make up a zone, a distance (in mm) and a rotation (in radians). The default value is 0 mm. | Defines an approximation zone for a target. Two variables make up a zone, a distance (in mm) and a rotation (in radians). The default value is 0 mm. | ||
| − | [[File: | + | [[File:ROBOTSplugin zone parameter.JPG]] |
Targets can be stop points or way points: | Targets can be stop points or way points: | ||
| Line 203: | Line 206: | ||
IMPORTANT: If multiple targets use the same zone, first use a string or number to cast into a zone parameter, then assign the parameter to the different targets. Don't assign a string or number directly as a zone to multiple targets, as different zone instances will be created (even if they have the same value) and will create unnecessary duplication in the robot code. | IMPORTANT: If multiple targets use the same zone, first use a string or number to cast into a zone parameter, then assign the parameter to the different targets. Don't assign a string or number directly as a zone to multiple targets, as different zone instances will be created (even if they have the same value) and will create unnecessary duplication in the robot code. | ||
| + | |||
| + | '''--''' | ||
| + | |||
| + | It should be noted here that the information gathering was drawn by Ricardo Mayor Luque, and many people at IAAC | ||
Latest revision as of 15:59, 19 November 2020
Contents
Robot Programming with Robots plugin
[part of the information explained here is coming from: https://github.com/visose/Robots/wiki/How-To-Use#grasshopper]
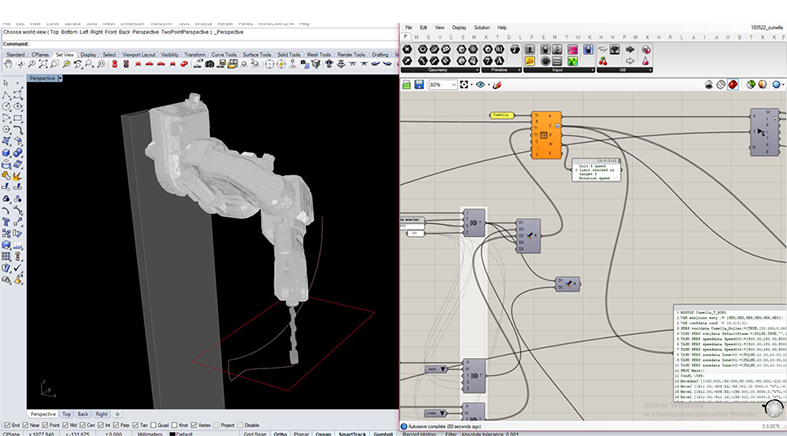
Grasshopper plugin for programming ABB, KUKA and UR robots for custom applications. Special care is taken to have feature parity between all manufacturers and have them behave as similar as possible. The plugin can also be used as a .NET library to create robot programs through scripting inside Rhino (using Python, C# or VB.NET). Advanced functionality is only exposed through scripting.
How To Use
The basic Grasshopper workflow:
1- Select your robot model using the "Load robot" component.
2- Define your end effector (TCP, weight and geometry) using the "Create tool" component.
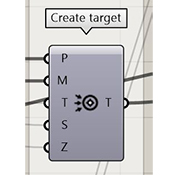
3- Create a flat list of targets that define your tool path using the "Create target" component.
4- Create a robot program connecting your list of targets and robot model to the "Create program" component.
5- Preview the tool path using the "Simulation" component.
6- Save the robot program to a file using the "Save program" component. If you're using a UR robot, you can also use the "Remote UR" component to stream the program through a network.
Parameters
TARGET
A target defines a robot pose, how to reach it and what to do when it gets there. A tool path is made out of a list of targets. Besides the pose, targets have the following attributes: tool, speed, zone, frame, external axes and commands.
There are two types of targets, joint targets and Cartesian targets:
Joint target: The pose of the robot is defined by 6 rotation values corresponding to the 6 axes. This is the only way to unambiguously define a pose. The first target of a robot program should be a joint target.
Cartesian target: The pose of the robot is defined by a plane that corresponds to the desired position and orientation of the TCP. Cartesian targets can produce singularities, the most common being wrist singularities. This happens when the desired position and orientation requires the 4th and 6th joints to be parallel to each other.
Cartesian targets contain two optional attributes, configuration and motion type:
CONFIGURATION
Industrial robots have 8 different joint configurations to reach the same TCP position and orientation. By default, the configuration in which the joints have to rotate the least is selected. This is determined using the least squares method, which is also the closest distance between targets in joint space. All joints are weighted equally. You can explicitly define a configuration by assigning a value (from 0 to 7) to the Configuration variable. Forcing a configuration doesn't define a pose unambiguously since the joints might rotate clockwise or counter-clockwise depending on the previous target.
Motion type
A robot can move towards a Cartesian target following either a joint motion or a linear motion:
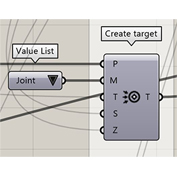
Joint: This is the default motion type. In a joint motion, the controller calculates the joint rotation values on the target using inverse kinematics and moves all of the joints at proportional but fixed speeds so that they will stop at the same time at the desired target. The motion is linear in joint space but the TCP will follow a curved path in world space. It's useful if the path that the TCP follows is not critical, like in pick and place operations. Since inverse kinematics only needs to be calculated at the end of the path, it's also useful to avoid singularities.
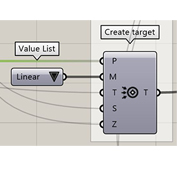
Linear: The robot moves towards the target in a straight line in world space. This is useful if the path that the TCP follows is critical, like while milling or extruding material. If the path goes through a singularity at any point it will not be able to continue. If it moves close to a singularity it might slow down below the programmed speed.
Castings
A string containing 6 numbers separated by commas will create a joint target with default attribute values. A plane will create a Cartesian target with default attribute values.
Tool
This parameter defines a tool or end effector mounted to the flange of the robot. In most cases a single tool will be used throughout the tool path, but each target can have a different tool assigned. You might want to change tool if your end effector has more than one TCP, or due to load changes during pick and place. Contains the following attributes:
Name: Name of the tool (should not contain spaces or special characters). The name is used to identify the tool in the pendant and create variable names in post-processing.
TCP: Stand for "tool center point". Represents the position and orientation of the tip of the end effector in relation to the flange. The default value is the world XY plane (the center of the flange).
Weight: The weight of the end effector in kilograms. The default value is 0 kg.
Mesh: Single mesh representing the geometry of the tool. Used for visualization and collision detection.
Coordinate systems
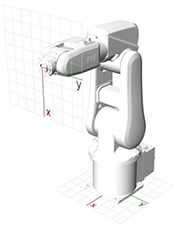
As with Rhino, the plugin uses a right-handed coordinate system. The main coordinate systems are:
World coordinate system: It's the Rhino document's coordinate system. Cartesian robot targets are defined in this system. They've transformed to the robot coordinate system during post-processing.
Robot coordinate system: Used to position the robot in reference to the world coordinate system. By default, robots are placed in the world XY plane. The X axis points away from the front of the robot, the Z axis points vertically.
Tool coordinate system: Used to define the position and orientation of the TCP relative to the flange. The Z axis points away from the flange (normal to the flange), the X axis points downwards.]]
As with Rhino, the plugin uses a right-handed coordinate system. The main coordinate systems are:
World coordinate system: It's the Rhino document's coordinate system. Cartesian robot targets are defined in this system. They have transformed into the robot coordinate system during post-processing.
Robot coordinate system: Used to position the robot in reference to the world coordinate system. By default, robots are placed in the world XY plane. The X axis points away from the front of the robot, the Z axis points vertically.
Tool coordinate system: Used to define the position and orientation of the TCP relative to the flange. The Z axis points away from the flange (normal to the flange), the X-axis points downwards.
Robot
Represents a specific robot model. It's used to calculate the forward and inverse kinematics for Cartesian targets, to check for possible errors and warnings on a program, for collision detection and simulation. If your robot model is not included in the assembly, check the wiki on how to add your own custom models.
Remote connection: You can use the robot parameter to connect to the robot controller through a network. Currently, this is only supported on UR robots.
Create a program:
Units: The plugin always uses the same units irrespective of the robot type or document settings.
Length: Millimeters
Angle: Radians
Weight: Kilograms
Time: Seconds
Linear speed: Millimeters per second
Angular speed: Radians per second
Uploading the program to a robot
A program defines a complete toolpath and creates the necessary robot code to run it. To create a program you need a list of targets and a robot model.
When a program is created, the following post-processing is done:
It will clean up and fix common mistakes.
It will run through the sequence of targets checking for kinematic or other errors.
It will return warnings for unexpected behaviour.
It will generate a simulation to preview the toolpath.
It calculates an approximate duration of the program.
If there are no errors, it will generate the necessary code in the robot's native language.
Errors
After the first error is found, it will stop and output a program ending in the error. Most errors are due to kinematics (the TCP not being able to position itself on the target). There are other errors, like exceeding the maximum payload. To identify the error, preview simulation of the program at the last target. Programs that contain errors won't create native code.
Warnings
The program will also inform of any warnings to take into account. Warnings may include changes in configuration, maximum joint speed reached, targets with unassigned values, first target not set as a joint target. Programs that contain warnings will create native code and might be safe to run if the warnings are believed to not cause any issues.
Code
To run the program, a code has to be generated in the specific language used by the manufacturer (RAPID for ABB robots, KRL for KUKA robots and URScript for UR robots). If necessary, this code can then be edited manually. A program containing edited code will not check for warnings or errors and can't be simulated.
Simulation
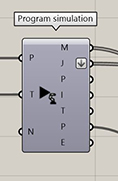
The program contains a simulation of the tool path. The simulation currently doesn't take into account acceleration, deceleration or approximation zones. It simulates both linear and joint motions, actual robot speed, including slowdowns when moving close to singularities and wait times.
Zone
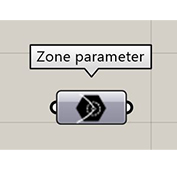
Defines an approximation zone for a target. Two variables make up a zone, a distance (in mm) and a rotation (in radians). The default value is 0 mm.
Targets can be stop points or way points:
Stop points have a distance and rotation value of 0. All axis will completely before moving to the next target. Commands associated with this target will run just after the TCP reaches the target.
Way points have a distance or rotation value greater than 0. Once the TCP position is within the distance value to the target, it will start moving towards the next target. One the TCP orientation is within the rotation value, it will start orienting towards the next target. This is useful to create a continuous path and avoid the robot stopping (decelerating and accelerating) at the cost of precision. Commands associated with this target will usually run a bit before the TCP enters the zone area.
IMPORTANT: If multiple targets use the same zone, first use a string or number to cast into a zone parameter, then assign the parameter to the different targets. Don't assign a string or number directly as a zone to multiple targets, as different zone instances will be created (even if they have the same value) and will create unnecessary duplication in the robot code.
--
It should be noted here that the information gathering was drawn by Ricardo Mayor Luque, and many people at IAAC
