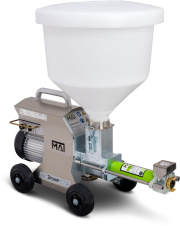
Difference between revisions of "MAI2 PUMP PICTOR 3D"
(→Operating the machine) |
(→End Effectors) |
||
| Line 43: | Line 43: | ||
- Step 2: Turn off the main switch | - Step 2: Turn off the main switch | ||
| − | == | + | ==Cleaning the machine== |
| − | |||
| − | |||
| − | |||
| − | |||
| − | + | '''Step 1:''' Wash the hopper with clean water, rub the hopper if it is necessary | |
| − | + | ||
| − | + | ||
| − | + | ||
| − | + | ||
| − | + | ||
| − | + | ||
| − | + | '''Important:''' | |
| − | + | ||
| − | + | ||
| − | + | ||
| − | + | Never use any cutter or any sharp/rough tools to clean the hopper, always use the rubber tool that is provided. | |
| − | + | ||
| − | + | ||
| − | + | ||
| − | + | '''Step 3:''' Soak a sponge ball in water. | |
| − | + | ||
| − | + | ||
| − | + | ||
| − | + | '''Warning!''' | |
| − | + | Never disconnect the hose when there is any pressure in the pressure gauge. Remove the remaining pressure gauge reaches 0. | |
| − | + | ||
| − | + | '''Step 4:''' Open the hose coupling, insert the sponge ball into the hose. | |
| − | + | ||
| − | + | '''Step 5:''' Reconnect the hose coupling | |
| − | + | ||
| + | '''Step 6:''' Start pumping and wait for the sponge ball to come out of the hose. | ||
| + | |||
| + | '''Step 7:''' Grease the pump after cleaning to ensure the pump gasket is residue free. | ||
| + | |||
| + | '''Step 8:''' Ensure that the grease is pushed out of the pump gasket. | ||
==Robotic Processes== | ==Robotic Processes== | ||
Revision as of 18:03, 19 April 2023
Contents
Technical Data
- Operating voltage: 230V/1/N/PE/50Hz
- Nominal power: 1,5 kW
- Fusing: 16 A
- Delivery rate:
- Worm pump 24L 0S: 1,5 to 9,5 l/min infinitely adjustable
- Worm pump 10L 0S: 0,6 to 4,0 l/min infinitely adjustable
- L x W x H: 75 x 34 x 43 cm
- Filling height: 75 cm
- Total weight: 33 kg
Health & Safety
- Never run the machine dry, at least water is needed to operate the pump otherwise damage may occur.
- Never let the material fall below the minimum material level and always keep the screw under the material.
- Never disconnect the hose when there is any pressure in the pressure gauge.
Operating the machine
- Using the pump
- Turn on the switch on the controller
- Step 1: Turn on the main switch
- Step 2: Pour the mixed material into the hopper
- Step 3: Turn the Forward/Reverse Switch to FWD
- Step 4: Turn the Speed control to the desired speed
Stopping the pump:
- Turn on the switch on the controller
- Step 1: Turn the Forward/Reverse control to 0
- Step 2: Turn off the main switch
Cleaning the machine
Step 1: Wash the hopper with clean water, rub the hopper if it is necessary
Important:
Never use any cutter or any sharp/rough tools to clean the hopper, always use the rubber tool that is provided.
Step 3: Soak a sponge ball in water.
Warning!
Never disconnect the hose when there is any pressure in the pressure gauge. Remove the remaining pressure gauge reaches 0.
Step 4: Open the hose coupling, insert the sponge ball into the hose.
Step 5: Reconnect the hose coupling
Step 6: Start pumping and wait for the sponge ball to come out of the hose.
Step 7: Grease the pump after cleaning to ensure the pump gasket is residue free.
Step 8: Ensure that the grease is pushed out of the pump gasket.
Robotic Processes
- Pen Writing
- Pick & Place
- 3D Scan
- Spraying
- Reverse Milling (to be combined with Pick&Place application)
- 3D printing (plastic, clay, hydrogel...)
List of video of IAAC projects using a robot :
https://vimeo.com/album/3361210
http://www.iaacblog.com/programs/courses/mrac/2018-2019-mrac/
Maintenance
Downloads
Manual:
