Difference between revisions of "Formlabs"
(→How use "Preform" software?) |
|||
| Line 3: | Line 3: | ||
[[File:Machines 9.jpg| thumb |3D printer Formlabs]] | [[File:Machines 9.jpg| thumb |3D printer Formlabs]] | ||
| + | |||
| + | ==Technical Specifications == | ||
==How use "Preform" software? == | ==How use "Preform" software? == | ||
Revision as of 16:02, 22 January 2018
Contents
Technical Specifications
How use "Preform" software?
- Select the specific Setup of your printing :
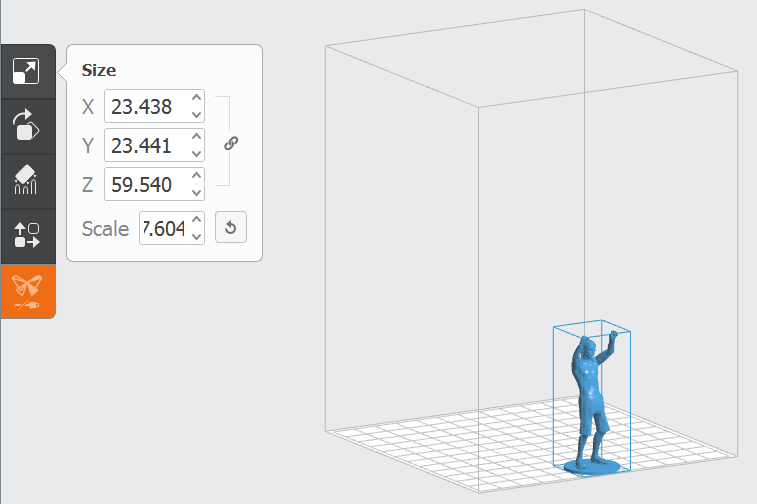
- After verifying the mesh, open your STL file and scale your object to be certain it fit into the cube.
Advice : always upload your file at netfabb cloud service before importing it on formlabs and make sure that you have preform software updated.

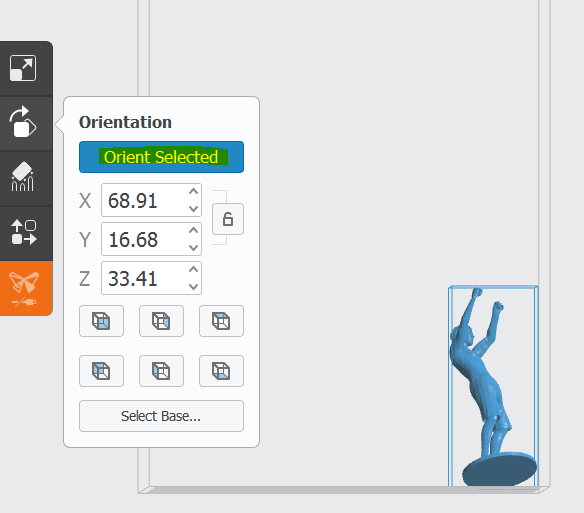
- Then, adjust the orientation by clicking on "orient selected". Thus the software give you the correct printable direction of your object. Do not hesitate to play with the orientation of the piece to optimize the material waist.

If a red task appears that means it will not print correctly. Do it again, or manually.
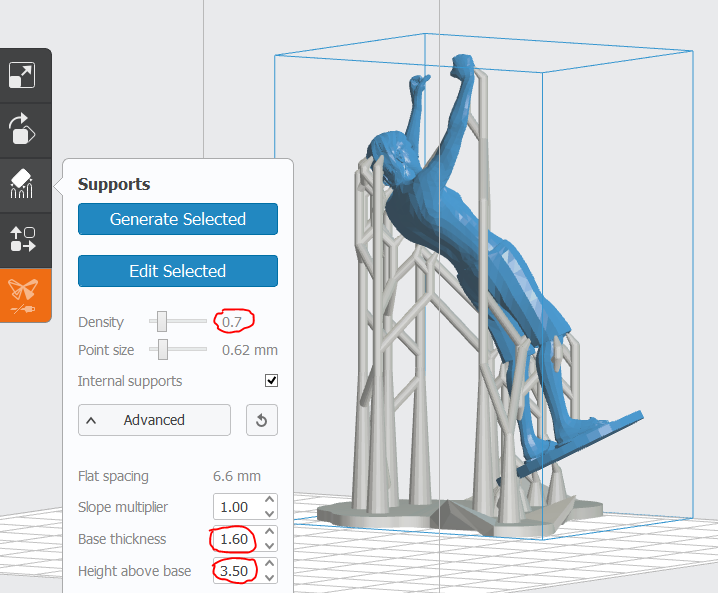
- Generate the support of your object. The red data (on the following picture) are those whhich will allow you to optimize the quantity of used resin according to your piece.
- Position the objects that you wish to print in a way they are not piled.
- If you are certain that is the correct resin, then print!
All the information concerning your printing appears in the following way :
![]() Kamera Nikon Murah
Kamera Nikon Murah
Post-Print Steps
NB : always use NITRILE GLOVES!
1. Remove the build platform
Always remove the build platform before removing the resin tank to avoid dripping leftover material into the printer body.
2. Use the scraper to remove print
3. Rinse part in Isopropyl Alcohol
Cover the rinse tub, shake for 2 minutes and let your part soak for 10 minutes. If you leave it more it will dissolve.
After each print, clean excess resin from the build platform and return it to the Form 1+. Leaving a wet build platform on the accessory kit makes it very hard to clean later.
Issues While Printing
Formlabs Official Website
Below are a few known issues that can occur while your part is printing. Use the advice to minimize print process problems.
Part Falls from Supports
If a part detaches from its supports during a print, you may need to strengthen the support contact using the advanced support settings. Spesifikasi Samsung Galaxy C9Try adjusting the touch point size and/or the support structure density.
Part Doesn't Adhere to the Build Platform
Monitor your prints from time to time to make sure they're adhering to the build platform correctly. If you realize the print has failed, simply cancel the print by holding the Form 1 button for 3 seconds, then clean the cured material from the printer. To resolve adherence issues, increase the base thickness or use the fine tuning setting to adjust the height of the build platform.
Printer Stops Mid-print
If your printer stops a print before finishing, try the following:
- Double-check that your printer power supply is securely plugged in and that you don’t have any electrical interruptions.
- Allow the entire print file to transfer from your computer to the Form 1+ before disconnecting the USB cable. The file transfer can take several minutes. Disconnecting too early will result in an incomplete model.
- Check whether the cover is completely closed and recognized by the printer.
Printer Unplugged During File Transfer
- Make sure the same instance of PreForm Software is still open.
- Plug the printer back in to resume the file transfer.
- If PreForm Software was closed, you can reload your saved scene and re-start the transfer.
Mirror Cleaning Instructions
It's critical that you use only PEC*PADs for your mirror cleaning, as they're the only product we've found thus far that doesn't damage the delicate surface of the Form 1(+) mirrors.
Instructions:
1) Can you inspect the large mirror with a light as depicted here? It should be completely free of all dust particles or smudges. Any blockage in the optical path can affect how the laser performs, and how your final print turns out.
2) Please clean the mirror, following the instructions here.
3) Please send me a photo of the mirror afterwards, duplicating the low-angle lighting shown in the mirror checking article.
4) Please clean the small mirror and galvo mirrors as depicted in the attached "Galvo Mirror Cleaning.pdf".
Submitting a Ticket
1. Clean the Resin Tank
2. Check the Mirror
3. Run the Test Print
4. Photograph the Test Print
5. PK AC
http://formlabs.com/support/troubleshooting/submitting-a-ticket/


