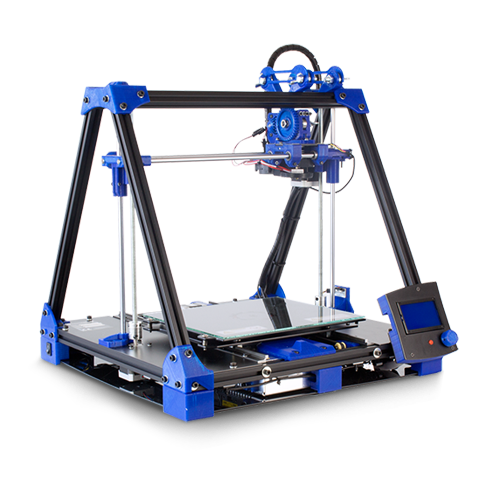
RepRapBCN
Technical specifications
- Printing Volume: Length: 252mm, Width: 200mm, Height: 200mm
LCD CONTROL
- The BCN3D+ can be operated from its LCD menu, a single button combining two movements:
- 1- Turn to move through the menu.
- 2- Click to select desired option.
- Adjacently to the control button there is an emergency red button to stop the machine in case of malfunction. It stops the printer but keeps the screen and fans on. Once pressed, the printer resets itself to resume use.
SETTING UP YOUR BCN3D+
- Hotbed height calibration
- For a proper use, the nozzle movement must be parallel to the Hotbed Surface.
To achieve that, there are three screws available to calibrate its orientation. There’s a risk of the nozzle hitting the hotbed glass or the first layer not sticking on its surface when decalibrated. The following steps must be followed:
- 1. Click Autohome (Prepare/Autohome) so the printer axes move to their initial position. The first time, caution should be exercised because the nozzle can collide with the base plate. If it is anticipated that this will happen, manually press the Z axis end stopper.
- 2. Adjust the screw triggering the endstop so the nozzle almost touches the glass when clicking Auto-home.
- 3. Tighten or loosen the three black screws levelling the base plate. The distance between the nozzle and the glass should be 0,2 mm. (Tip: use a folded paper to check)
- 4. Position the extruder in the left side using your hand (in case any resistance is felt, disable the stepper motors using Prepare > DisableSteppers). Level the base plate once again using the same procedure.
- 5. Move the base plate to the front to level the rear end of the plate.
- 6. Repeat the process until its four corners are levelled.
- 1. Heat the extruder. Warm the hotend up to printing temperature.
It is not necessary to click on Preheat, although it is advisable when wanting to print immediately after loading the spool. If that is not the case, click Menú>Control>Temperatura>Nozzle>220ºC.
- 2. Click on Prepare>Move axis> 1mm>Extruder, and rotate the wheel slightly clockwise (positive values) to extrude a few millimeters of material. This procedure will help prevent jams.
- 3. Click on Prepare>Move axis> 1mm>Extruder, and rotate the wheel anticlockwise (negative values) moving the gear a few steps back until the filament is free.
- 4. Once the old thread is out, load the new one. Click on Prepare>Move axis> 1mm>Extruder so the screws hold it tight . Move the wire slowly until the material exits trough the end of the hotend.
- 5. For a proper filament feeding, the idler screws must be tightened enough, offering a slight resistance when assisted with our fingers.
- 6. Once the extruder starts pulling the filament, tighten the screws until enough pressure is reached.
- 7. Once these steps are followed, the filament will be loaded and ready to print.
FILAMENTS
PLA
- PLA (polylactic acid) is the quintessential material for 3d printing, thanks to its ease of use through deposition. It is recommended to begin in this type of manufacturing technology with this material. A great variety of colors exists and complex geometries can be achived without great difficulty. The finish is slightly glossy or semi-matte.
Printing is carried out at temperatures ranging between 195º and 220° C, depending on the supplier of the material and printing speed. A layer fan is required to build overhangs. It easily attaches to the glass, and if you work at a hotbed temperature ranging 45º C-55º C, no product is requiered to ensure this adherence. The mechanical properties are average, but presents a certain fragility in parts requiring deformation, from a temperature of about 50 °, the parts can present it. It is dissolved in caustic soda.
