|
|
| (10 intermediate revisions by one user not shown) |
| Line 1: |
Line 1: |
| | [[Category:Machines]] | | [[Category:Machines]] |
| | | | |
| − | [[File:End+effector+2.jpeg| thumb |ABB IRB 120 (6 Axes Robot)]]
| + | <gallery widths=350 heights=200 style="text-align:center"> |
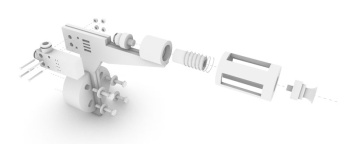
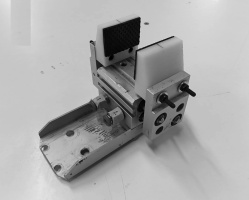
| − | | + | File:Motor Screw .jpg| Motor Screw Extruder |
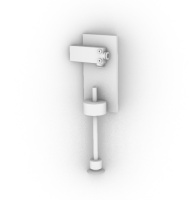
| − | | + | File:Suction Cap Vaccume Gripper.jpg| Suction cap Gripper |
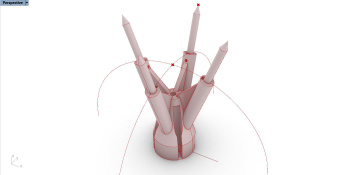
| − | ==Motor Screw Extruder== | + | File:FourFingersTool.JPG| Four Finger tool |
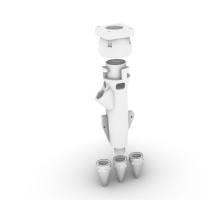
| − | | + | File:Extruder_Image_01.png| Concretepump Extruder |
| − | [[File:Motor Screw .jpg| 700 × 402 pixels]]<br><br>
| + | File:Pnumatic gripper.jpg | Pnumetic Gripper |
| − | | + | File:Small Pnumatic Gripper.jpg| Small Pnumetic Gripper |
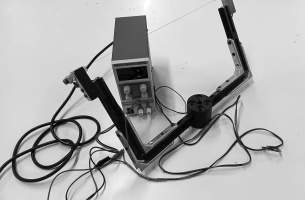
| − | | + | File:Hot wire Cutting.jpg| Hot Wire Cutting |
| − | Arduino Diagram
| + | File:Air spindle Milling.jpg| Air Spindle Milling |
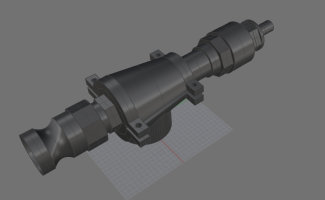
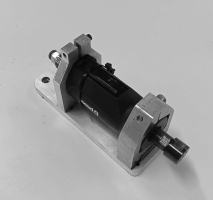
| − | | + | File:Milling Spindle 01.jpeg| Milling Spindle |
| − | [[File:Arduino Diagram.jpg| 700 × 402 pixels]]<br><br>
| + | File:Duel Suction Cap.jpg| Dual Suction Cap |
| − | | + | |
| − | | + | |
| − | Connection to robot
| + | |
| − | | + | |
| − | [[File:Arduino Optocoupler.jpg| 700 × 402 pixels]]<br><br>
| + | |
| − | | + | |
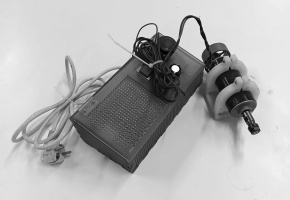
| − | elements, power supply inlet plug with undervoltage
| + | |
| − | release to prevent re-start in case of voltage interuption
| + | |
| − | | + | |
| − | 3- Hopper for wet premixed material
| + | |
| − | | + | |
| − | 4- Housing with polyurethan inlet
| + | |
| − | | + | |
| − | 5- Worm pump
| + | |
| − | | + | |
| − | 6- Pump outlet with pressure gauge
| + | |
| − | | + | |
| − | ==Operating the machine==
| + | |
| − | | + | |
| − | | + | |
| − | '''Connections Before Start-Up'''
| + | |
| − | | + | |
| − | Connect the main power plug to the control cabinet
| + | |
| − | with the cable to the construction 230V/1/N/PE/50Hz
| + | |
| − | (3x1,5mm2).
| + | |
| − | | + | |
| − | Make sure that all cables and safety devices are functioning properly.
| + | |
| − | | + | |
| − | | + | |
| − | | + | |
| − | | + | |
| − | | + | |
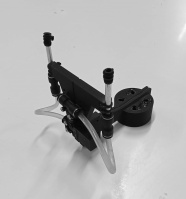
| − | ==Vaccume end effector with single Suction cap==
| + | |
| − | | + | |
| − | [[File:Suction Cap Vaccume Gripper.jpg| 700 × 402 pixels]]<br><br>
| + | |
| − | | + | |
| − | | + | |
| − | '''Required parts:'''
| + | |
| − | | + | |
| − | Vacuum Generator / Union / Square
| + | |
| − | | + | |
| − | Suction Cup (coval VP15NBRIF18C)
| + | |
| − | | + | |
| − | Pneumatic Push to Connect Fittings Male Straight | ∅ 8mm Tubing
| + | |
| − | | + | |
| − | ==Health & Safety==
| + | |
| − | | + | |
| − | | + | |
| − | - Always use safety glass while disconnecting the hose.
| + | |
| − | | + | |
| − | - Never run the machine dry, at least water is needed to operate the pump otherwise damage may occur.
| + | |
| − | | + | |
| − | - Never let the material fall below the minimum material level and always keep the screw under the material.
| + | |
| − | | + | |
| − | - Never disconnect the hose when there is any pressure in the pressure gauge.
| + | |
| − | | + | |
| − | ==Machine Views==
| + | |
| − | | + | |
| − | [[File:View.jpg| 700 × 402 pixels]]<br><br>
| + | |
| − | | + | |
| − | | + | |
| − | 1- Motor
| + | |
| − | | + | |
| − | 2- Control system: Frequency converter with switch
| + | |
| − | elements, power supply inlet plug with undervoltage
| + | |
| − | release to prevent re-start in case of voltage interuption
| + | |
| − | | + | |
| − | 3- Hopper for wet premixed material
| + | |
| − | | + | |
| − | 4- Housing with polyurethan inlet
| + | |
| − | | + | |
| − | 5- Worm pump
| + | |
| − | | + | |
| − | 6- Pump outlet with pressure gauge
| + | |
| − | | + | |
| − | ==Operating the machine==
| + | |
| − | | + | |
| − | | + | |
| − | '''Connections Before Start-Up'''
| + | |
| − | | + | |
| − | Connect the main power plug to the control cabinet
| + | |
| − | with the cable to the construction 230V/1/N/PE/50Hz
| + | |
| − | (3x1,5mm2).
| + | |
| − | | + | |
| − | Make sure that all cables and safety devices are functioning properly.
| + | |
| − | | + | |
| − | '''Start-up in manual mode'''
| + | |
| − | | + | |
| − | - Before Operating the machine check the machine state. Switch rightwards for manual mode.
| + | |
| − | | + | |
| − | [[File:2_MAI_2PUMP_PICTOR_3D_B_Kopie.jpg| 700 × 402 pixels]]<br><br>
| + | |
| − | | + | |
| − | | + | |
| − | - '''Step 1:''' Turn on the main switch
| + | |
| − | | + | |
| − | [[File:Onn_n_off_switch.jpg| 700 × 402 pixels]]<br><br>
| + | |
| − | | + | |
| − | | + | |
| − | - '''Step 2:''' Fill the material-hopper with wet premixed material.
| + | |
| − | | + | |
| − | - '''Step 3:''' Turn the Forward/Reverse Switch to FWD (Start the machine by turning the mode switch from
| + | |
| − | 0 to FWD)
| + | |
| − | | + | |
| − | [[File:Speed_controlle.jpg| 700 × 402 pixels]]<br><br>
| + | |